Pens down! A closer look at the nTop notebook
Written by nTop
Published on September 28, 2022
The nTop Notebook is integral to our software’s interface and packs unique capabilities. In this article, we delve deeper into the core elements and evolution of the Notebook and introduce some recent features to help increase your productivity.
As nTop users are building more complex, intricate, and expansive design workflows in nTop, the Notebook needed to evolve beyond its humble beginnings.
In this article, we take a walk down memory lane to review the basics of the Notebook, its evolution over the years, and the design decisions that went into creating nTop's main interface.
We will also examine some of the newest Notebook features: the Notebook Outline, the Notebook Search, and the Custom Block interface. We took inspiration from word processors to develop features that enable you to navigate and modify complex workflows faster and more efficiently than before.
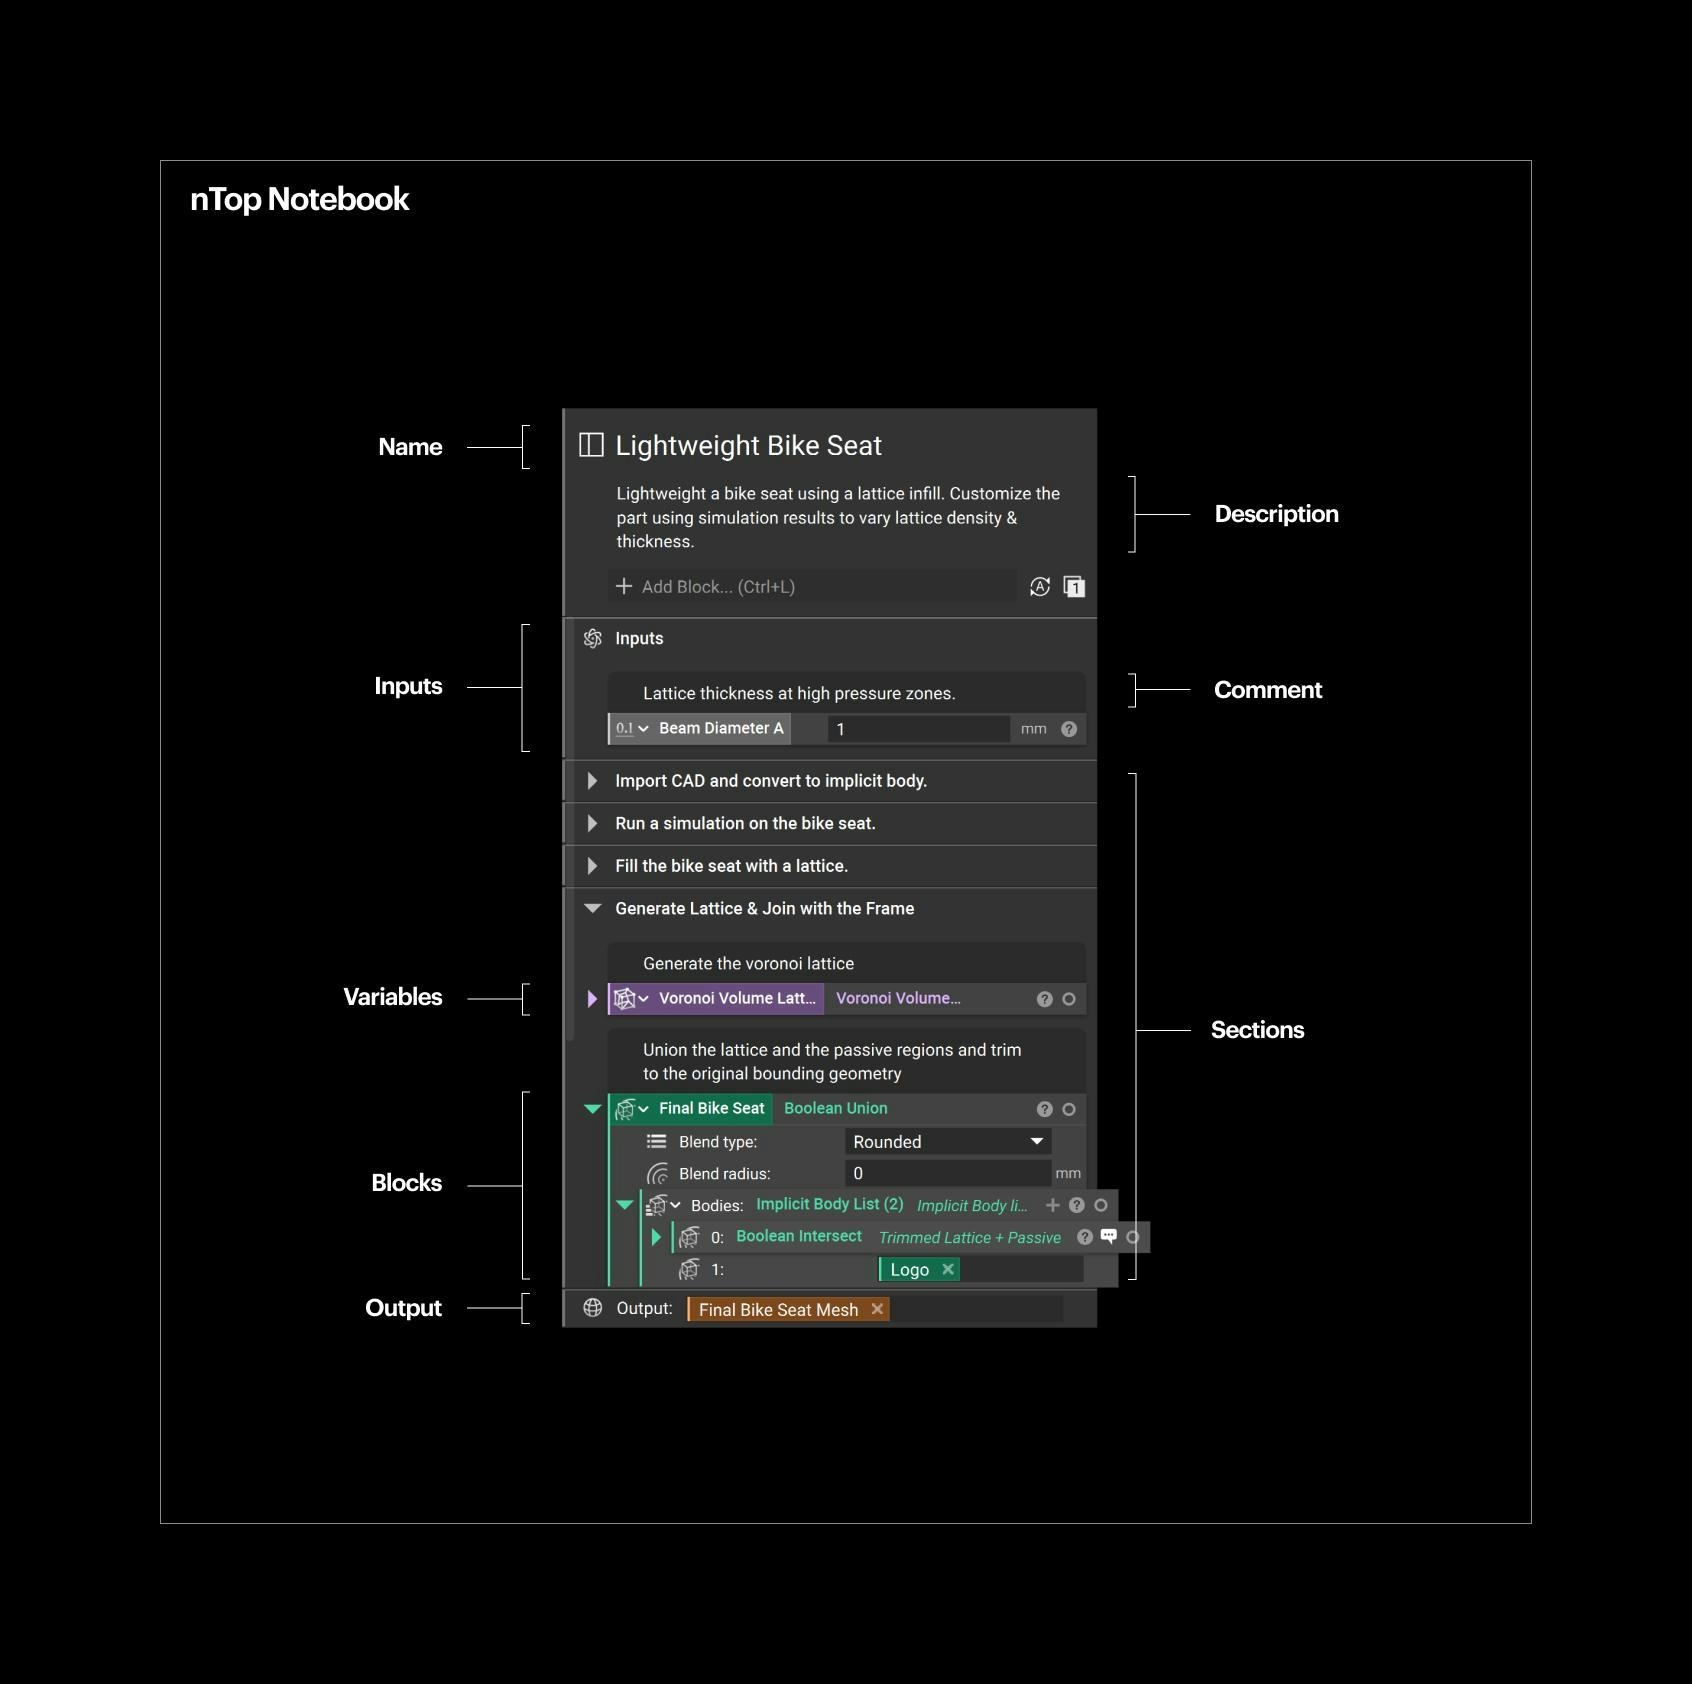
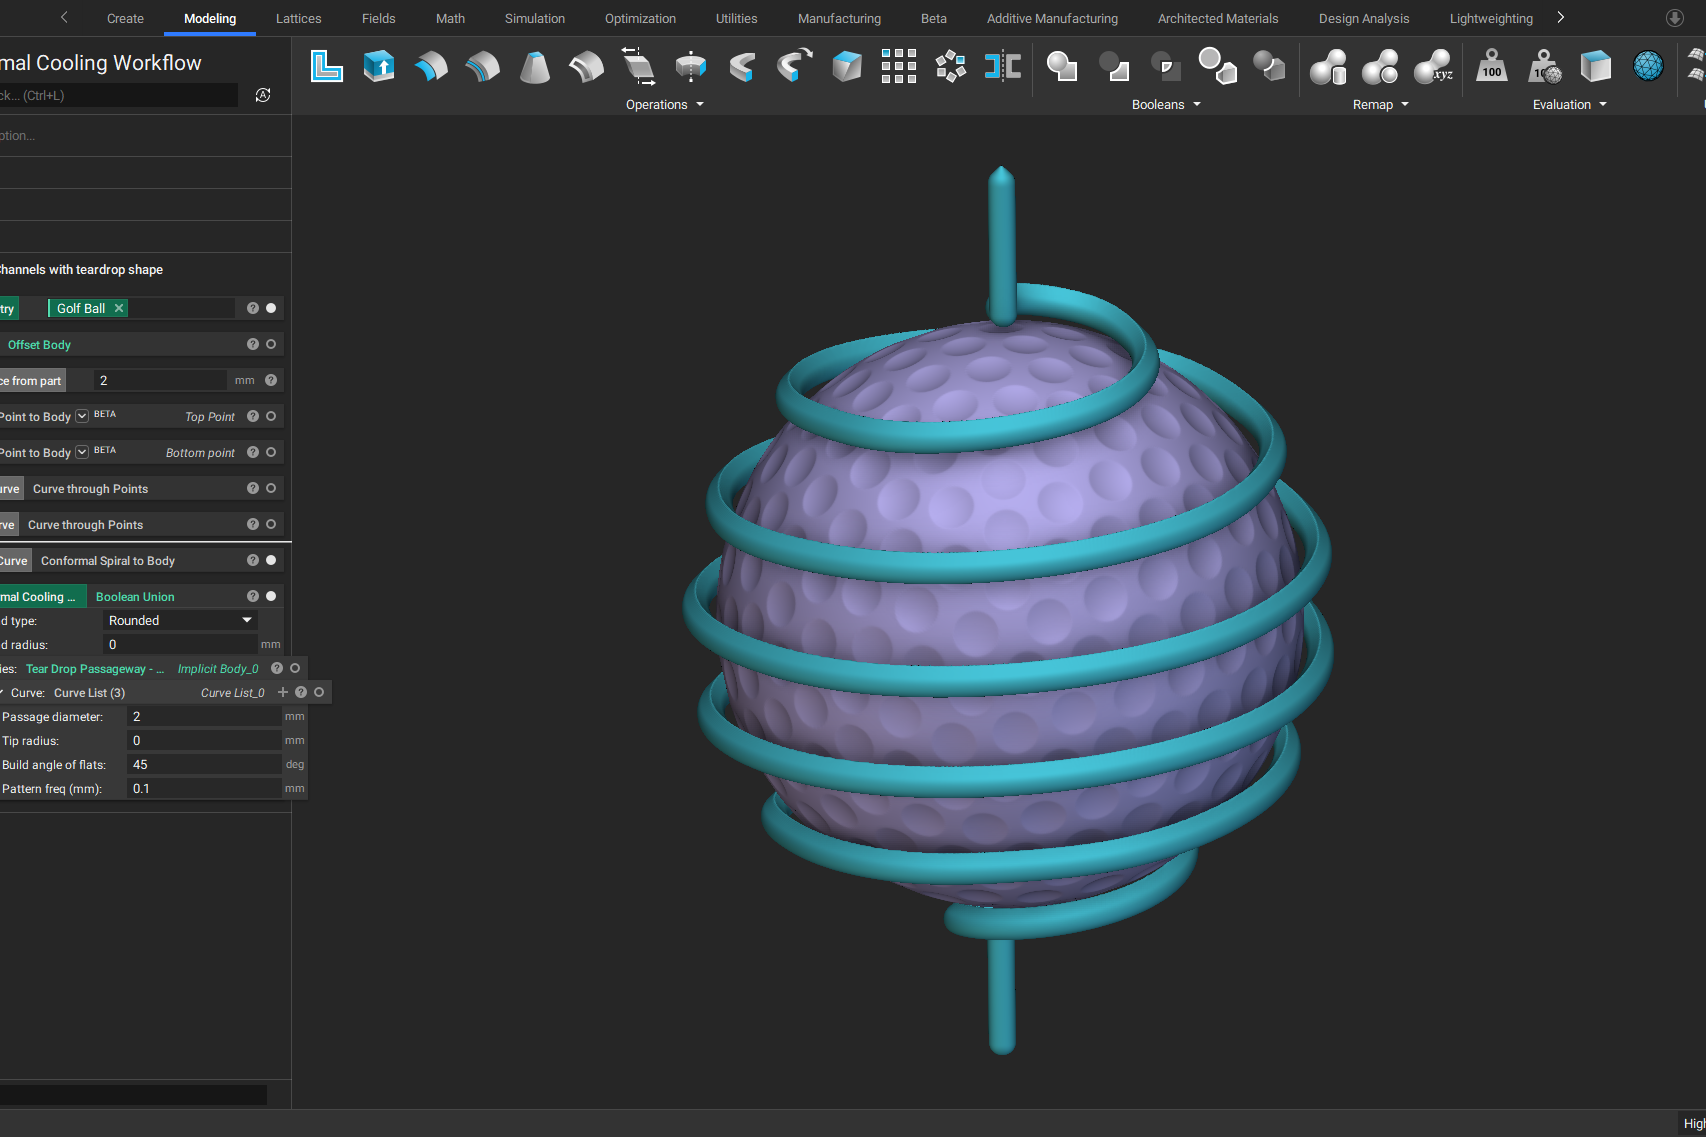
The anatomy of the nTop notebook
A well-maintained nTop notebook of a complex design workflow.
The nTop Notebook represents the basic steps of a design workflow in nTop. It documents all necessary modeling operations, geometry manipulations, and simulation steps to generate a design output based on specific inputs.
The Notebook captures an engineering design process. This process can be reused on different inputs to generate new design outputs.
A block represents a step of the design workflow. Blocks are the fundamental elements that create or modify geometry in nTop, and each of them serves a specific function. When given a set of inputs, a block computes a single output. This output can then be another block's input, creating more complex workflows.
The Notebook and the block system enable you to create generative design processes and reusable engineering workflows.
Over the years, we added more features to the Notebook to help you create tidy, organized, and easy-to-read files.
When you open a well-maintained nTop file created in the most recent version of the software, you will probably see a name and a short description. You will probably also find multiple sections and comments to organize the workflow and provide more information, as well as variables color-coded depending on their output data type. You may also see custom blocks, user-created functions that package a workflow with inputs and output into a reusable block.
It's important to note that, unlike model trees in traditional CAD software, operations in nTop are not performed on the geometry itself and are not sequential. It would help if you thought of blocks as functions that generate geometry (or other data outputs). What appears on the screen when you press the Toggle Visibility button is only a visual representation of the data calculated behind the scenes.
The notebook’s origins
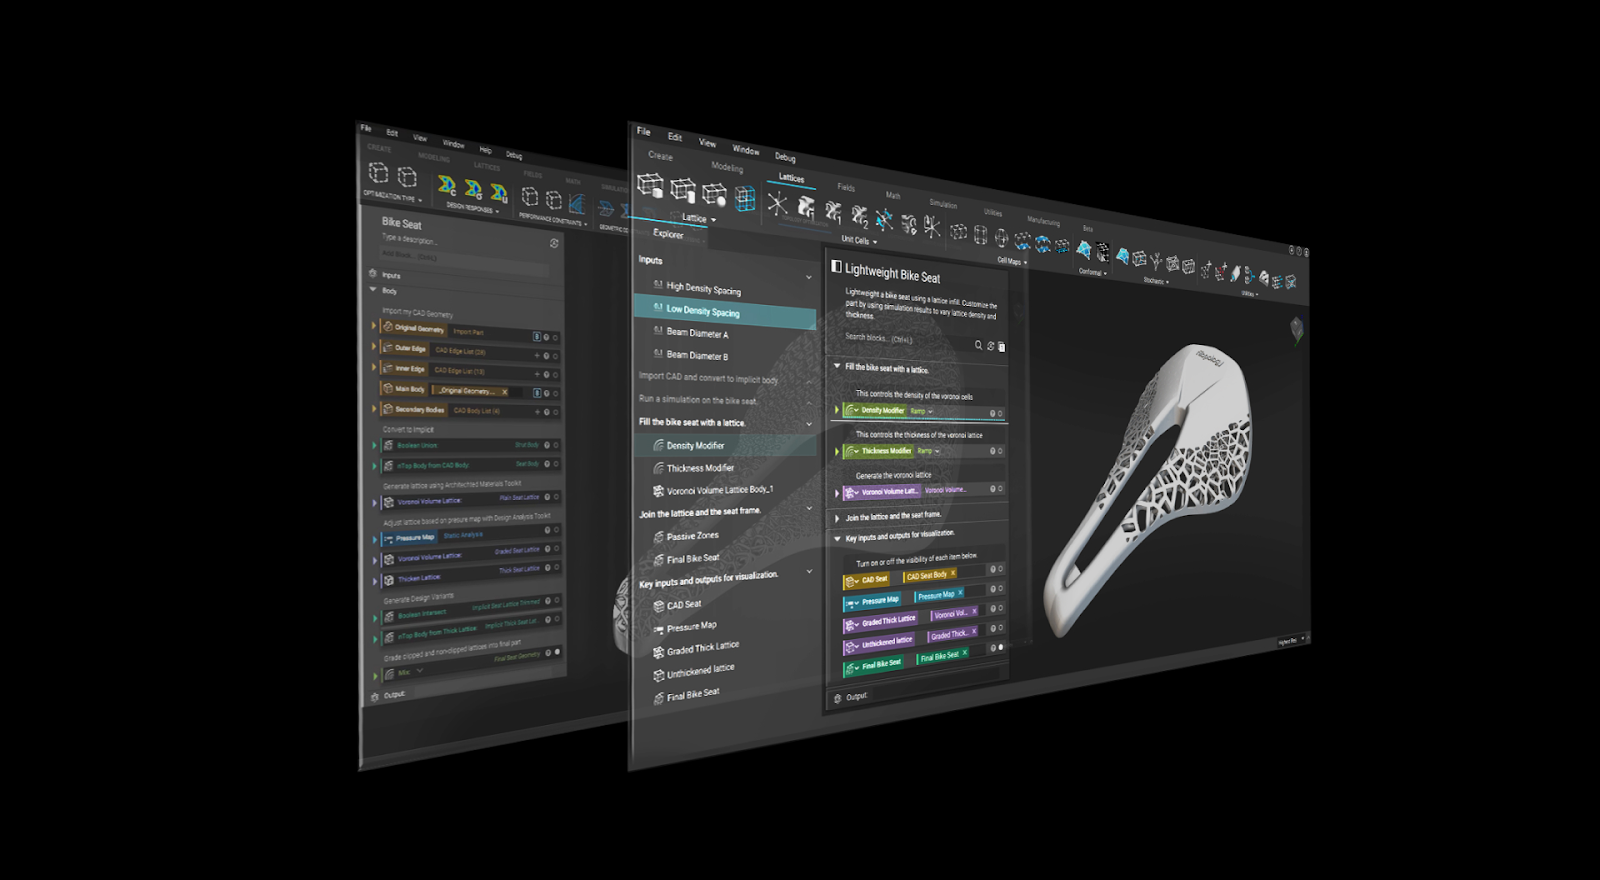
The nTop notebook has evolved since the first release of the nTop software.
You can think of nTop as the visual programming environment of a functional language for developing algorithmic design and engineering processes.
In the early days of developing our software, we were looking for a UI that would make the authoring experience as smooth as possible while looking familiar to users with prior experience in mechanical CAD.
Before opting for the Notebook layout, we considered two alternatives: writing code and using a node-based system. We decided to steer away from them for a few reasons:
- Writing code breaks the natural flow of the design process. Users want immediate feedback when they change their workflow, and having to write and compile code interrupts the fundamental design experience. Also, coding is still a niche skill among engineers and designers, and we wanted to create a tool that is easily accessible by as many users as possible.
- Node-based systems fall short when creating workflows of higher complexity. As the number of blocks and connections increases, it is inevitable that you will end up with “spaghetti diagrams” that are difficult to read and maintain.
The Notebook system provides a much more user-friendly experience than writing code but also gives the right level of abstraction to manage workflows with higher complexity than node-based interfaces.
We decided to use the “notebook analogy” because we wanted to create an interface resembling an engineering notebook.
We always wanted design workflows to be easy to read so nTop users could document their design processes and engineering knowledge and share them with others. This way, they can capture and disseminate their expertise rather than just sharing the result—as is common in traditional CAD software, where the result is just a model.
New notebook features
Like every other aspect of our software, the Notebook is actively evolving. We recently released three new features that make it easier to author, navigate, and update complex workflows in nTop.
The notebook outline
Inspired by Google Docs, this expandable outline lets you see a high-level overview of your workflow, quickly navigate to blocks, and trace where you used each variable in your Notebook. Learn more.
The Notebook Outline gives you a complete visual overview of large Notebooks, so you can better understand the overall structure and quickly view relevant sections.
Video with details on the nTop notebook.
The Notebook Outline also has another helpful feature: variable tracing.
When you select a variable, all the instances where it is used will be highlighted so you can quickly snap to the relevant block.
Video with details on the nTop notebook.
Notebook search
Another new feature inspired by word processors is the Notebook Search. You can now search for specific blocks used within your Notebook. Learn more.
To use the search function, click at the search bar at the top of the Notebook Outline or use the Ctrl+F shortcut and start typing the name of a block or variable.
Video with details on the nTop notebook.
Custom block viewing and editing
Custom blocks are integral to complex workflows, as they enable you to package processes and reuse them in multiple Notebooks. You can now view a Custom Block directly in your main nTop instance. Learn more.
To access the Custom Block editor, right-click the Custom Block and select “Open Block” to view its contents directly in your nTop Notebook. You can then directly edit the Custom Block and apply the changes when you return to the main instance of your nTop Notebook.
Video with details on the nTop notebook.
What’s next?
The user interface of our software is a cornerstone of active research and development for the nTop team.
We will continue to provide expert users with more advanced programming capabilities to explore and develop complex and refined design workflows. At the same time, we strive to make our software more accessible for beginners and casual users, so we are also developing ways to customize and simplify the interface for specific applications.
As our software evolves, we will ensure nTop is powerful yet approachable for users across the skill spectrum.
What do you think of the nTop Notebook? Please share with us your experience with the new Notebook features on LinkedIn or Twitter.

nTop
nTop (formerly nTopology) was founded in 2015 with the belief that engineers’ ability to innovate shouldn’t be limited by their design software. Built on proprietary technologies that upend the constraints of traditional CAD software while integrating seamlessly into existing processes, nTop allows designers in every industry to create complex geometries, optimize instantaneously, and automate workflows to develop breakthrough 3D-printed parts in record time.
Related content
- VIDEO
Five ways to lightweight in nTop
- VIDEO
Sneak peek into the nTop + Autodesk Fusion 360 integration
- ARTICLE
Optimizing thermal management with conformal cooling to extend operational life
- ARTICLE
Advancing structural performance of aerospace heat exchangers
- VIDEO
Design a spooky Halloween candy bowl in nTop